The Benefits of Using Hair Oil
Using hair oil as part of your hair care routine can offer several benefits. Firstly, it helps to moisturize dry scalp and strands. This is essential for maintaining the hair’s natural sheen and elasticity. Oils can penetrate the hair shaft, providing deep nourishment that can revive dull and brittle hair.
Regular application of hair oil can also reduce frizziness, making hair more manageable and easier to style. This taming effect is especially important for those with curly or coarse textures. Additionally, oils can form a protective layer over the hair cuticle. This can minimize damage from heat styling tools and environmental factors like the sun and wind.
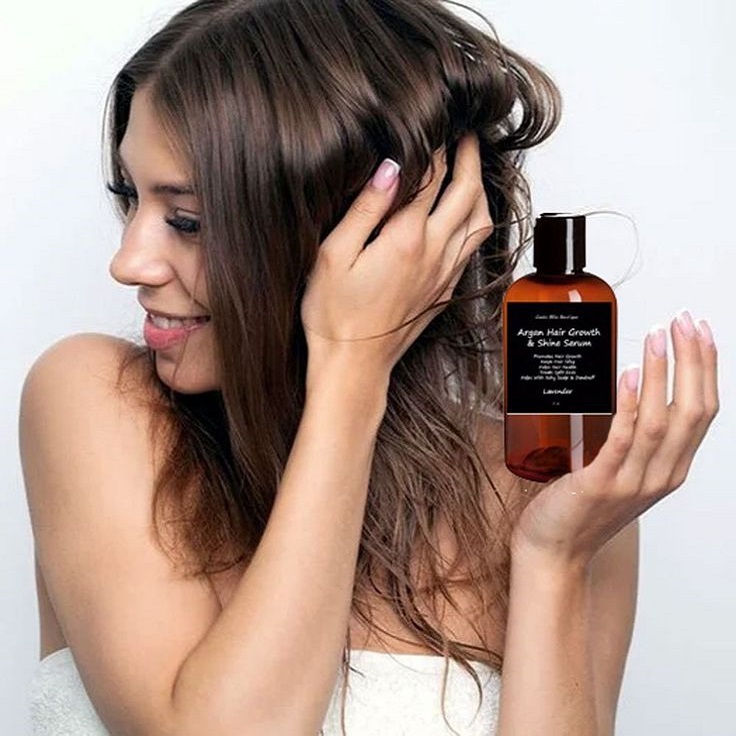
An often overlooked advantage of using hair oil is its potential to stimulate the scalp. Massaging oil into the scalp can promote blood circulation, which is critical for healthy hair growth. Some oils are known for their properties that potentially can prevent issues like dandruff and scalp infections.
Lastly, because of the versatility in how to make hair oil, you can custom blend ingredients to target specific hair concerns. Whether it’s dryness, oiliness, thinning, or scalp health, a DIY approach allows you to curate a concoction that meets your unique hair needs.
By incorporating hair oils into your regimen, you’re not just taking a step towards healthier hair but also indulging in a self-care practice that can be both soothing and rewarding.
Essential Oils and Carrier Oils: The Base of Your DIY Blend
When diving into how to make hair oil, understanding essentials and carriers is key. Essential oils, highly concentrated plant extracts, infuse your blend with therapeutic properties. But, they must be diluted with carrier oils. Carrier oils are less volatile and serve as the base for your hair oil recipes.
Choosing the Right Carrier Oil
Picking a carrier oil hinges on your hair’s needs. For instance, coconut oil is a go-to for deep moisture. It penetrates well and suits most hair types. Jojoba oil mimics our natural scalp oils, making it ideal for balance. Argan oil, rich in vitamin E, promotes shine and softens hair. Always consider oil weight; light oils like grape seed won’t weigh down fine hair.
Selecting the Best Essential Oils for Hair Health
Move on to essential oils once your base is set. Peppermint oil can stimulate the scalp, encouraging growth. Lavender’s anti-inflammatory qualities soothe the scalp and may reduce dandruff. Rosemary oil is a favorite for overall hair health, potentially strengthening circulation. Remember, a few drops go a long way. Blending essential oils into your carrier oils carefully can lead to the ultimate homemade hair care solution.
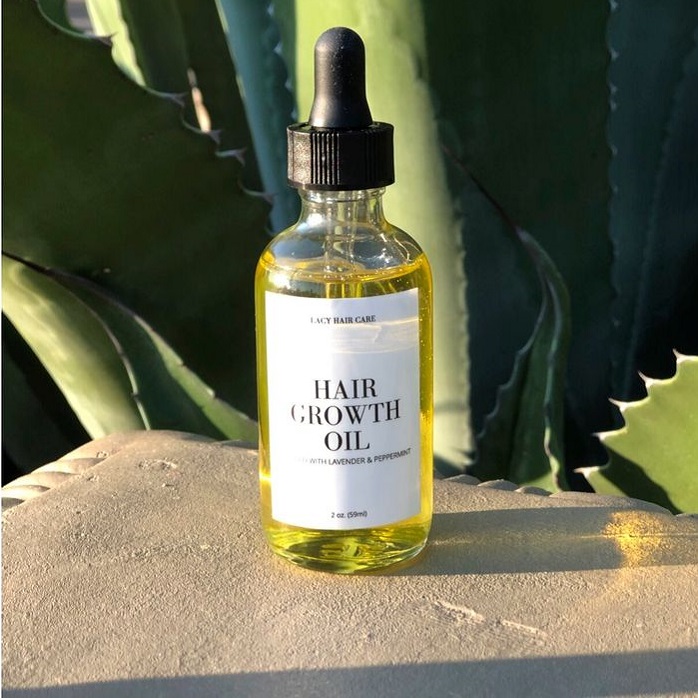
Step-by-Step Guide to Making Your Own Hair Oil
Creating your own hair oil blend is a simple and rewarding process. Here’s a streamlined guide to start you off. First, select your base carrier oil as we discussed in the previous section. Ensure it aligns with your hair’s unique needs. Now it’s time to blend in the essential oils that provide targeted benefits for hair health. Here’s how to make hair oil in just a few steps:
- Gather your materials. You’ll need a clean glass bottle or jar, a small funnel, and your choice of carrier and essential oils.
- Begin with your carrier oil. Pour the desired amount into the glass bottle. This typically is about 1/4 cup to start with for a standard size blend.
- Add your essential oils. Use only a few drops—roughly 2-5 drops of essential oil per tablespoon of carrier oil—to avoid irritation.
- Close the bottle and shake well. This helps to evenly mix the essential oils into the carrier oil.
- Label your bottle. Note the ingredients and the date made, so you can keep track of freshness.
- Perform a patch test. Before applying widely, test the oil on a small skin area to check for any adverse reactions.
With these steps, you’re on your way to crafting a hair oil that’s tailor-made for your hair care routine. Keep in mind the importance of proportions and the unique properties of each oil you use. Remember, the joy of how to make hair oil lies in the ability to customize it for your specific hair concerns.
Customizing Your Hair Oil Blend for Different Hair Types
Our hair types are unique, requiring tailored hair oil blends. Here’s how to customize yours.
For Dry and Damaged Hair
For those with dry and damaged hair, intense moisture is key. Start with a rich carrier oil like coconut or olive oil as they deeply condition. Add argan oil for its vitamin E and antioxidants. Essential oils like ylang-ylang and sandalwood help restore strength and add moisture. Mix a few drops of each essential oil into your carrier base and apply generously.
For Oily Hair
If you have oily hair, lightweight oils are your friends. Jojoba oil is a great choice since it regulates oil production. Add tea tree oil for its cleansing properties. Lemon or bergamot essential oils can also balance oil secretion. Use sparingly on scalp and hair for a non-greasy finish.
For Hair Growth
For hair growth, focus on stimulating the scalp. Castor oil is thick and can promote growth. Combine it with peppermint oil for circulation and rosemary oil for its hair-strengthening effect. Apply the blend to your scalp with gentle massages. A little goes a long way.
Knowing how to make hair oil for your specific hair type allows for better, more targeted care. Remember, customization is the key to maximizing the benefits of your homemade hair oil blends.
Key Ingredients and Their Benefits for Hair
When making your own hair oil, choosing key ingredients is crucial for effective results. Each ingredient brings unique benefits to your hair. Here are some of the most beneficial ones to consider.
- Coconut Oil: Deeply moisturizes and conditions the hair. It’s known for reducing protein loss, which is essential for strong, healthy hair.
- Olive Oil: Full of vitamins and antioxidants, it helps protect the hair. It also penetrates the hair shaft, offering deep conditioning.
- Argan Oil: Promotes shine and softness, and is rich in vitamin E, which is great for restoring dry and damaged hair.
- Castor Oil: Known for promoting hair growth and thickness. It also has anti-inflammatory properties that support scalp health.
- Jojoba Oil: Balances the scalp’s natural oils making it perfect for both dry and oily hair types.
- Peppermint Oil: Stimulates the scalp, potentially enhancing hair growth through improved circulation.
- Rosemary Oil: Believed to strengthen circulation to the scalp and encourage hair growth.
- Lavender Oil: Has calming properties and can help to reduce scalp inflammation and dandruff.
- Tea Tree Oil: Has antifungal and antibacterial properties that can help to keep the scalp free from infections.
Knowing how to make hair oil with these powerful ingredients can make a real difference in your hair’s health. Try to use a mix that fits your specific hair needs for the best results.
How to Apply Hair Oil Effectively
To get the most out of your DIY hair oil, applying it correctly is crucial. Here’s a straightforward method to ensure your hair reaps all the benefits:
- Start with a small amount. Use just a few drops or a small squirt of oil in your palm.
- Warm the oil. Rub it between your palms to heat it slightly, which can help it penetrate better.
- Begin with the scalp. Massage the oil into your scalp gently with your fingertips. This aids in stimulating blood flow.
- Work through the hair. Take the oil from the scalp down to the ends of your hair. Focus on dry or damaged parts.
- Comb it through. Use a wide-tooth comb to evenly spread the oil and detangle your hair.
- Leave it on. Allow the oil to sit for at least thirty minutes or overnight for deep conditioning.
- Wash it out. Use a mild shampoo to clean your hair and remove excess oil without stripping away moisture.
For effective hair oil application, practice consistency. Apply your custom oil blend 1-2 times a week, or as needed, based on your hair’s condition. Remember, moderation is key; too much oil can weigh hair down.

Tips for Storing and Preserving DIY Hair Oil Blends
Creating your own hair oil blends is just the first step. You must also store and preserve them correctly. Here are some tips to keep your DIY hair oil effective for longer:
- Use dark glass bottles: These protect the oil from light, which can degrade its quality over time.
- Keep in a cool place: Store your oil away to avoid heat. Warm temperatures can cause spoilage.
- Avoid moisture: Water in your oil can lead to bacteria or mold. Make sure your bottle is dry.
- Close tightly: Always seal your oil bottle well to keep air out. It helps prevent oxidation.
- Label clearly: Write the contents and the date on the bottle. This way, you know when it’s fresh.
- Use antioxidants: Add a few drops of Vitamin E oil. It acts as a natural preservative.
- Check the smell: If the oil smells off, it may have gone bad. Trust your nose.
- Refill small amounts: Instead of making a large batch, mix small batches often.
By following these simple tips, you can extend the life of your DIY hair oil blends. They help ensure your hair always gets the best care. Remember, quality and freshness in your ingredients make for better hair health.